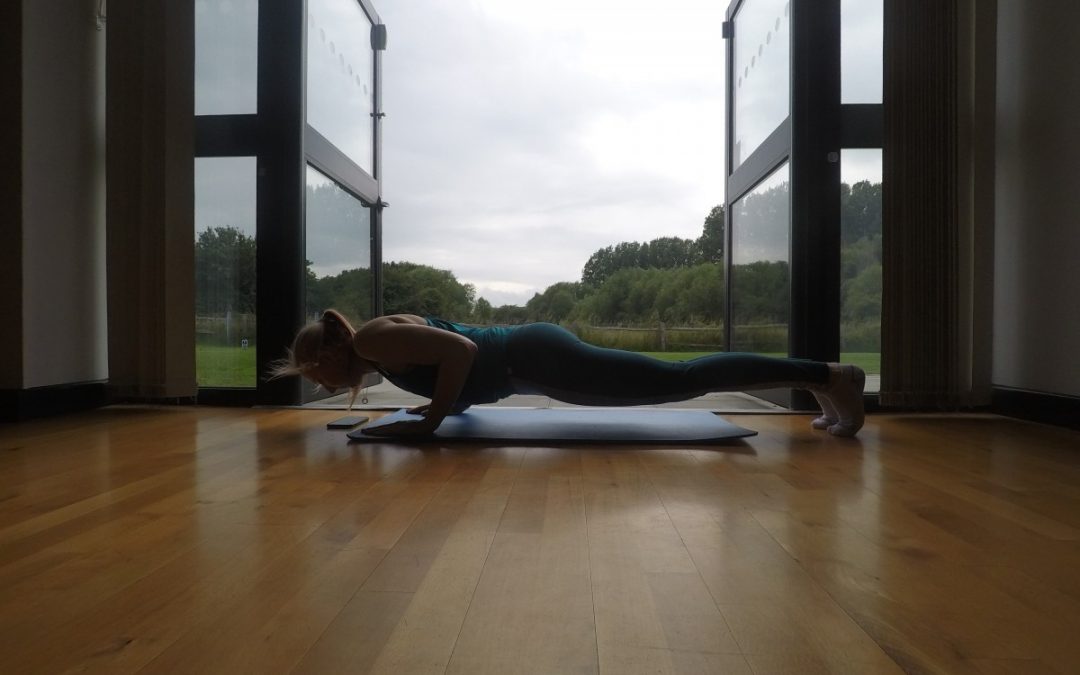
Welcome to my new Pilates workout Wednesday series. Every week I am going to bring you a new Pilates workout you can do from the comfort of your own home. I know sometimes we are all time crunched and don’t get time to spend an hour on ourselves (we should!) so my workouts are all under 10 minutes long and can be done from anywhere by anyone in most cases.
My Pilates workouts start off with easy levels and increase in difficulty, please adapt and use the levels that are right for you. Reduce the range of movement or number of reps if you find it too hard. These 10 minute videos are a great addition to one of my weekly Pilates classes.
My aim with all my Pilates classes is to offer a bespoke service. Apart from my Get up and Go council led classes all private Pilates classes run with no more than 10 clients per session to make sure I can give a personalised service and feedback on every move. So although below shows the difference between class levels I can accommodate everyone within my classes in most cases.
Beginners:
Starting with the complete basics and principles at a physically gentle level. This can be more of a challenge mentally as you learn how to use your body correctly and identify how to avoid ‘compensations’. This is where everyone should start off on their Pilates journey.
Improvers:
Building on the techniques learned in the beginners classes, in Improvers, we develop the exercises to a more physically demanding level, whether that means increasing the range of movement or reps required per exercise. One or two alternatives and explanation and visual demonstration will be given. Improvers requires knowledge of the basic principles but not necessarily great physical strength.
Intermediate:
The pace of this level is faster with slightly less detailed explanation as we go through progressions. Participants are expected to know the exercises as they start to explore harder movements and begin to understand their own limits, with more verbal correction given.
Advanced:
This most physically demanding level, a real work-out but still follows the basic principles. Everyone should work to their own level within each exercise. The pace is fast moving and challenging. Participants are expected to know their own limits and modification alternatives if a move does not suit their body.
I hope you found this useful. I run my Pilates classes from venues in Westbourne, Emsworth, West Stoke (near Funtington), Bedhampton, Havant and Waterlooville.
Please get in touch if you have any questions, are interested in joining my Pilates classes or go to my Pilates page on my website by clicking this link.
The highest ever levels of activity have been recorded by Sport England’s latest Active Lives Adult Survey, with 1 million more people physically active than when the survey began.
According to Sport England, data gathered from 180,000 respondents (aged 16+) in the 12 months from May 2018 to May 2019, 1,015,700 more people are active compared to when the survey started, in 2015.
That takes the total number of active people – those doing at least 150 minutes of moderate intensity physical activity per week – up to 28.6 million.
The number of inactive people – doing fewer than 30 minutes of moderate intensity physical activity per week – is down to 11.2 million, a decrease of 131,700 since 2015 and the lowest figure ever recorded by the survey.
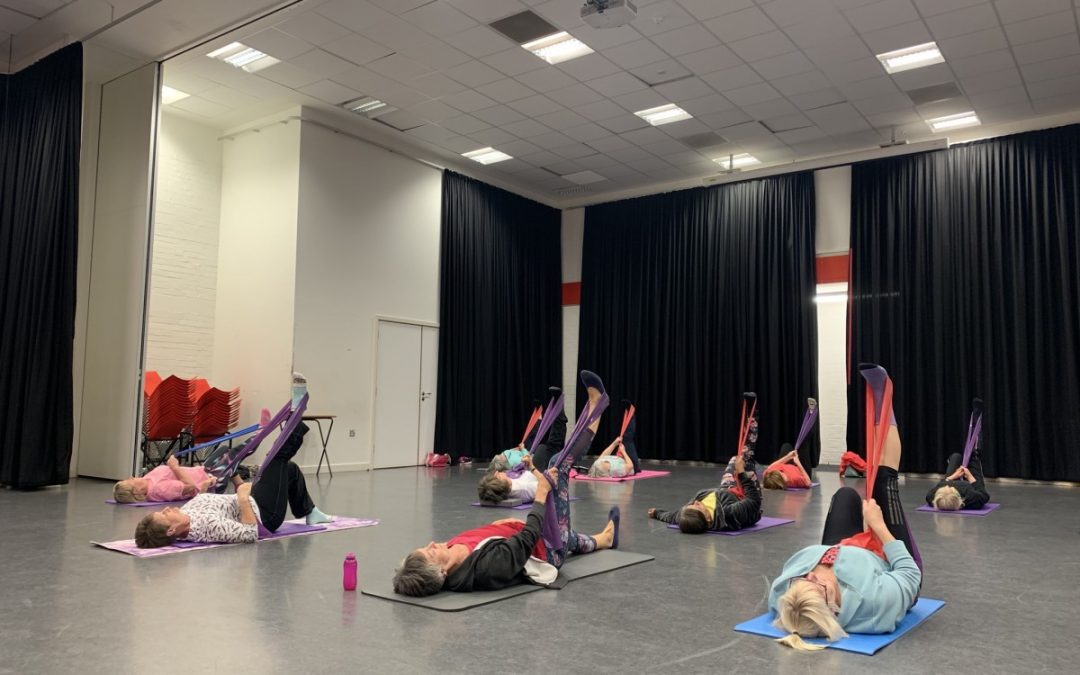
Hannah Attenburrow from Beyond the Mud, runs Pilates classes and workshops as well as mountain biking coaching and guiding. Hannah has been working with Havant Borough Council, as part of their Get Up and Go program, to offer Pilates classes for the over 55’s in the borough and has seen her classes go from strength to strength with many participants who starts in January still attending one or more classes weekly. Classes run from Havant, Waterlooville, Bedhampton and Hayling Island.
Pilates is great for building strength and coordination which are two things that diminish as we get older. Pilates focuses on posture, strength, mobility and flexibility from head to toe, moving the body in complete flowing movements, not isolated parts.
Hannah said;
‘The Great thing about Pilates is it is suitable for anyone no matter your age, fitness of flexibility. Each exercise can be done at different levels of intensity with additional modifications to cater for anyone with specific muscular or joint limitations.’
One participant who has been coming since January said;
‘Get Up and Go has provided the incentive to try out Pilates risk-free.
I was unsure about undertaking this form of exercise as I have a very severe left-sided kypho scoliosis – a deformity of my spine and I know from previous experience how easy it is to end up bedridden if I twist or turn too harshly. The pilates class has gradually improved my mobility.
Hannah was amazing, allowing for my difficulties and even sending me a link to exercises specifically for my condition. She never pushes me beyond what I can comfortably do and will suggest an alternative exercise to those for the class if needed.
Hannah checks us regularly to ensure we are doing the exercises in the correct position and frequently reminds us of our breathing, something I forget easily!
Maddison, too, is very supportive and I love going to the classes where incidentally, I met up with somebody I first worked with in 1974!
A lovely group, mostly women but with a few men, too. Don’t hold back, please try it out very soon!
The Get Up and Go Program in the Havant borough offers many activities to over 55’s including golf, guided walks, chair fitness, Pilates and yoga classes.
Keeping active is important as we get older but often people forget about strength training and building muscle in favour of cardiovascular exercise like running, swimming, rowing and so on.
Ideally, you should aim to focus on both if you can – something that has just been reiterated by the UK chief medical officers and the Department of Health and Social Care, which has just published new physical activity guidelines that emphasise the importance of building strength and balance.
The guidelines haven’t been updated since 2011 and now recommend that adults should do strength-based exercises at least twice a week to help delay the natural decline in bone density and muscle mass that typically starts at around 50 years old. The overall message has stayed the same, however – any activity is better than doing none at all and more activity is even better than that.
It’s thought that a drop in muscle mass and bone density is one of the main reasons why older people lose their ability to do daily tasks with ease, with falls the main reason that people above a certain age are taken to hospital. This could be avoided, however, through the likes of carrying heavy shopping, brisk walking, swimming, gardening and taking the stairs.
Physical activity can also help protect against chronic health conditions like type 2 diabetes (reducing the risk by 40 per cent), coronary heart disease (35 per cent) and depression (30 per cent).
The guidance also includes safe levels of activity for both pregnant women and new mothers, with a moderate amount of exercise for the latter proven to help them ease back pain, regain strength and reduce the chances of developing gestational diabetes.
“Physical activity is an under-appreciated asset in our clinical arsenal. It is cheap and brings a long list of health benefits.
“As we age, our muscles weaken and we can become stiff, leading to falls and difficulty performing everyday activities. Physical activity can prevent fragility and support mobility in old age. By keeping active, both throughout the day and also through hobbies, we can slow muscle and bone decline, ultimately keeping us independent for longer,” Dame Sally Davies, chief medical officer for England, said.
When it comes to strength training, going for Pilates in Waterlooville or your local area could prove particularly beneficial. This practice aims to strengthen the entire body in a balanced way, with emphasis on core strength as a way of improving general health and wellbeing.
It is suitable for people of all ages and levels of ability, so don’t worry if you’re a complete beginner… you’ll soon pick it up. Regular practice can help improve your posture, muscle tone and balance, while also relieving any stress and tension you may be experiencing.
If you feel as though your fitness for mountain biking could use some work but you’re not sure where to begin, you could certainly do a lot worse than following some of the advice offered by Rachel Atherton.
Speaking to GQ magazine, she recently revealed some of her training tips and explained that her training schedule is quite fluid which keeps it interesting and means she can work around any big events or races.
Monday is typically a recovery day, however, if she’s had a race over the weekend. Tuesday is the main training day and the one that includes a host of exercises that will be useful for aspiring mountain bike racers too.
She always begins her session with activation, which are exercises targeted at keeping her on her bike and dealing with existing injuries. This is followed by two strengthening exercises – one for strength and one for power – six conditioning exercises and finishes with work for her energy systems, usually a Wattbike session or ride on her XC bike.
Rachel also fits in yoga, massages and does other exercise like stand-up paddleboarding, and swimming during her week. Nutrition is key as well, and she offered lots of insight into her diet throughout the week too.
“During the past three years, researchers from Napier University have been conducting a massive research project with Enduro World Series participants collecting information about mountain bike injuries, and more importantly how to prevent them. “The survey was carried out by Sports Scientist Dr Debbie Palmer of Edinburgh Napier University and covers the full breadth of participation, from our recreational rider base right through to the upper echelons of elite athletes.”
The report comprises of two separate pieces of research. The first questioned 2,000 EWS-racing athletes, from 46 countries, across 10 EWS races, recording how, when, and where they were injured. Highlights include the most frequently occurring injuries and those injuries that resulted in the most days spent off the bike recovering.
The findings are rather fascinating which low concussion rates and more injuries during the 2016 XC mountain bike race in RIO in 2016 than in the Enduro World Series events!
It doesn’t come as a surprise that shoulder and clavicular injuries are the most common. These injuries typically involve a long recovery – 25 days on average.
So, how can enduro rider’s improve their strength around their shoulders to decrease this injury risk.
(Picture thanks to EWS report)
What makes up your shoulder?
The shoulder is an extremely complex joint made up of three bones: the clavicle (collarbone), the scapula (shoulder blade), and the humerus (upper arm) as well as the associated muscles, ligaments and tendons.
The humerus loosely attaches to the scapula in a ball and socket joint that allows the arm to rotate in a circular manner or to hinge up and away from the body. The joint must be mobile enough to do a wide range of dynamic movements (like throwing), but also stable enough to lift heavy objects and push and pull. This compromise between mobility and stability means the muscles need to be strong and stable to protect this joint.
The major muscles involved with movement of the shoulder are the four rotator cuff muscles and the deltoid. These muscles allow the upper arm to rotate in and out, move forward, out to the side, and behind the back. Tendons are the bands of fibrous connective tissue that attach these muscles to the humerus.
Here are our top 5 shoulder stability exercises to help you combat those injuries.
Rotator Cuff External Rotation with Band
Palms facing up hold the band out in front of you
Keep your elbows tucked in
Forearms parallel to the ground
Breath in, on the exhale open the band to the side
Hold for the inhale
Exhale bring arms back to the centre
Repeat 5 times
To increase strength add in pulses once the band is opened to the side
High to Low Row
Attach a resistance band to something sturdy at or above shoulder height. Be sure it is secure so it doesn’t come lose when you pull on it
Get down on one knee so the knee opposite the outstretched arm is raised. Your body and lowered knee should be aligned. Rest your other hand on your raised knee
Holding the band securely with your arm outstretched, pull your elbow toward your body. Keep your back straight and squeeze your shoulder blades together and down as you pull. Your body should not move or twist with your arm, engage your core muscles to stop this from happening
Return to start and repeat 3 sets of 10
Reverse Fly
Stand with your feet shoulder-width apart and your knees slightly bent. Keep your back straight and bend forward slightly at the waist
With a light weight (bean cans of full water bottles will do) in each hand, extend your arms and raise them away from your body.
Do not lock your elbow. Squeeze your shoulder blades together as you do so.
Do not raise your arms above shoulder height
Return to start and repeat 3 sets of 10
4. Press Up (Bi-cep)
Start standing, bend your knees and put your hands on the floor so they are under your shoulders
Lift your knees off the floor so you are in a sloping position, don’t stick your bum in the air or let your hips drop (keep your knees on the floor for a modified box press up)
Hands facing forward slowly lower your nose towards the floor, elbows moving outwards
Engage your core, (pull your belly button towards your spine) to help protect your lower back
Inhale at the bottom, exhale and push yourself back up into the sloping position
5. Press Up (tri-cep)
Start standing, bend your knees and put your hands on the floor so they are under your shoulders
Lift your knees off the floor so you are in a sloping position, don’t stick your bum in the air or let your hips drop (keep your knees on the floor for a modified box press up)
Hands facing forward slowly lower your nose towards the floor, elbows moving towards your hips, arms grazing the side of your body
Engage your core, (pull your belly button towards your spine) to help protect your lower back
Inhale at the bottom, exhale and push yourself back up into the sloping position
THIS WEBSITE USES COOKIES
We use cookies to personalise content and ads, to provide social media features and to analyse our traffic. We also share information about your use of our site with our social media, advertising and analytics partners who may combine it with other information that you’ve provided to them or that they’ve collected from your use of their services. You can review our Privacy and Cookie Policies and at any time change or withdraw your consent from the Cookie Declaration on our website.