by hattenburrow | Nov 28, 2017 | Adventure, Biking Adventures, How to
Winter riding doesn’t have to be a frosty affair it can be good fun and very beautiful especially if you are prepared.
“If you fail to prepare, you prepare to fail”
My advice would be look at what rides / training you want / need to do then head to trusty (or not so) BBC weather forecast and look at the week ahead this will help you plan longer rides on days when the weather is better and shorter sessions in the rain.

One thing to mention on this is that if you’re doing sprints, wet / icy weather and slippery roads are not a good combo so be ready to change your session accordingly if you can be flexible in your training around the weather and expect that, it will rain, you will get wet and it may be cold for the first 5 minutes until you warm up then riding will be enjoyable.
It is true what they say there is never the wrong weather just the wrong gear.
My top kit list would be:
- Grip Grab overshoes – warm and dry feet make riding in wet and cold weather so much more comfortable. Make sure you buy a size that hugs your shoes I recommend The Hammerhead, it is a warm and waterproof coated neoprene winter shoe cover. Designed and tested to keep your feet warm and dry in wet and cold weather conditions.
- Altura Night Vision Evo jacket this versatile jacket is labelled for ‘commuting’ however I love mine for every occasion it’s great for training the big vents on the sides give adequate breathability whilst knowing I have the waterproof and high visibility factors Altura say: The Night Vision Evo features lightweight, waterproof, windproof and breathable fabrics in a soft touch 2 Layer Altura Shield™ EVO fabric, which help to keep you both dry and warm on your rides. You then have the benefit of critically positioned reflective details and an ingenious integrated i-Lume™ rear flashing light to ensure you are easily seen. With the addition of NV360° performance you have 360 degrees of reflectivity for maximum after dark visibility from all angles.
- The cloudburst glove from Grip Grab is waterproof and windproof glove, like slipping your hands into hot water bottle covers whilst you ride with a soft fleece lining. The OutDry® Waterproof and Breathable membrane makes the Cloudburst gloves that will serve you well as an all-round high-end glove.

Riding through winter tips:
- Early mornings are stunning wake up and get out before the sun rises and watch it come up also a bonus around Christmas is seeing everyone’s Christmas lights!
- Put a little warm water in your bottles if riding in freezing conditions to stop it freezing.
- Get your kit on the radiator ready to go!
- Check your tyre pressure riding in a lot of mud – decrease the air in your tyres to help with grip
- Get a good pair of lights, ideally helmet and handle bar Exposure lights are fantastic but pricey for a cheaper option search amazing from 1000 lumen lights
- Invest in thermal underwear and a good rain / windproof
- Let people know where you’re going and how long you will be out

by hattenburrow | Nov 15, 2017 | Adventure, How to
[fusion_builder_container hundred_percent=”no” equal_height_columns=”no” menu_anchor=”” hide_on_mobile=”small-visibility,medium-visibility,large-visibility” class=”” id=”” background_color=”” background_image=”” background_position=”center center” background_repeat=”no-repeat” fade=”no” background_parallax=”none” enable_mobile=”no” parallax_speed=”0.3″ video_mp4=”” video_webm=”” video_ogv=”” video_url=”” video_aspect_ratio=”16:9″ video_loop=”yes” video_mute=”yes” video_preview_image=”” border_size=”” border_color=”” border_style=”solid” margin_top=”” margin_bottom=”” padding_top=”” padding_right=”” padding_bottom=”” padding_left=””][fusion_builder_row][fusion_builder_column type=”1_1″ layout=”1_1″ spacing=”” center_content=”no” hover_type=”none” link=”” min_height=”” hide_on_mobile=”small-visibility,medium-visibility,large-visibility” class=”” id=”” background_color=”” background_image=”” background_position=”left top” background_repeat=”no-repeat” border_size=”0″ border_color=”” border_style=”solid” border_position=”all” padding=”” dimension_margin=”” animation_type=”” animation_direction=”left” animation_speed=”0.3″ animation_offset=”” last=”no”][fusion_text]
Hi folks! Here is the second in my guest blog series from Helen Read.
Helen was always really active as a youngster, getting involved in anything and everything she could, but lost the outdoors in her 20s. When going through a period of anxiety and depression, her friends persuaded her to train for and attempt to hike the Welsh 3000 that reinvigorated her love for the mountains and fresh air.
Ever since she has been on a quest to live the adventurous life that she is truly passionate about and helps her regulate the stresses of daily life. Whenever she has the opportunity she will be up a hill (or possibly under one) or on the water generally avoiding cities. One downside of liking so many different adventure sports is that it takes a very long time to improve ability, so she is currently planning a year away from work living the van life round Europe in order to focus more time on each one.
Go Helen!
[/fusion_text][fusion_text]
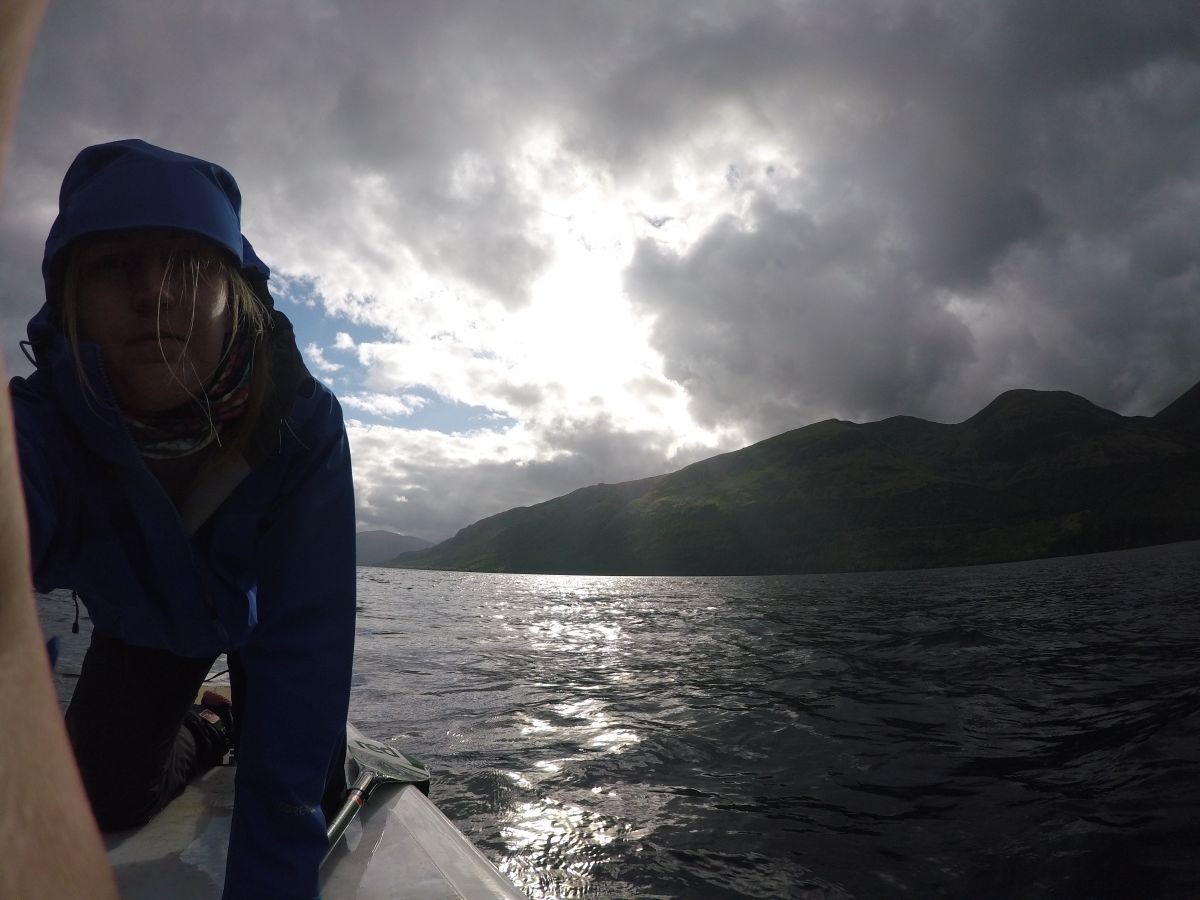
I woke up in my camper-van to a misty morning at the foot of Ben Nevis. It was the second week of my adventures in Scotland and I was feeling the difference between my normal office days and daily mountainous excursions that I’d had for the last 10 days.
By the time I persuaded myself to get up it was 10 and after stocking up on food for the coming trip I eventually found myself at the top of Neptune’s Staircase by lunchtime and the start of my adventure.
It was a strange feeling paddling away from my van and into the unknown, About 20 minutes in and Scotland did what Scotland does best as it started raining, luckily I was already togged up in my wetsuit (overkill) and waterproofs (entirely necessary) and it was a canal stretch so the water was calm, making negotiating the scout group not too troublesome.
Happy despite the rain
My first lock didn’t go entirely to plan. The first pair was inexplicably open so I paddled through, hoping there would be a landing stage in the middle that could hop out at so I’d only have to portage the last bit, but unfortunately not, so I had to paddle back out and walk around.
This was my first attempt at portaging and was not my most graceful. As it was such a long way I wanted to do it in one, so I put all my baggage in the paddle board bag (which luckily has wheels) with the paddle sticking out of the top, and the paddleboard in the other hand waddling up the tow-path, having to stop every 15m or so because my hand hurt. 20kg of board is quite a lot on one tiny handle! For future locks it wasn’t quite so far so I tended to do 2 trips, except for when the lovely lock-keeper at Loch Lochy insisted on giving me a hand.
It wasn’t long into my paddle that I realised I had forgotten to bring the little map that I had been given when I picked up a key for the lock facilities. So at that lock, I thought I’d carry on, still feeling pretty fresh at 4.30 because I started so late. That was a mistake.
Leaving Gairlochy
As I rounded the bend, heading east from Gairlochy lock, I discovered I had just set out on a loch. It wasn’t long before the exposure had let the wind pick up the water into little waves that made balancing extremely tricky and led me to resort to kneeling. I intended to follow the navigation buoys effectively through the middle of the loch, but not far into my voyage the topography to the west meant the wind began funnelling and it wasn’t long before I had been blown across to the east shore.
The waves seemed to be bigger the further down the lock I got and to keep direction I was paddling 3:1 on the right. Not wanting to fall in on day one I did my best not to end up side on into the waves.
Kneeling meant that all my balance and suspension was being done by my lower back, by the evening I was beginning to get back spasms and was in a lot of pain. I did find a couple of beaches that seemed to belong to hotels and in one instance wandered up to ask if there were any rooms because all I could dream about was a cosy bed, but I was out of luck.
Pretty sky, pain face
Meanwhile, there was a stunning sunset going on and I was torn between wanting the pain to stop and being so happy and grateful for being there at that moment to see it. I know it’s a view I could have gotten from a layby on the adjacent road, but feeling so isolated as the only person on an unpowered vessel in that whole loch just made it feel magic.
That solitude also let me give myself permission to cry, yelp and moo (don’t know why) every time my back seized up and there were points where I tried to stretch it out but got a wave to the face, so had to reserve that mostly for beaches.
The moment I first caught sight of the next lock was joyous though as it signalled the return to canals and I got an amazing night’s sleep even in my horrible little coffin tent.
Laggan Locks
The next day was completely different. The canal passed through woodland and had a Scandinavian feel about it. By lunchtime the cloud had burnt off and it was a lovely sunny day. At this point I wished I hadn’t got a wetsuit on as I was getting pretty toasty, but I hadn’t really bought any alternative clothes that I was willing to get wet- preferring to save my PJ’s for night time. On the plus side I didn’t get sunburn either!
Read about the rest of Helen’s trip on Trek and Trade Winds.
Top tips for getting started paddleboading:
1. Give it a go, most kayak places near still water now also hire out paddleboards so you can get a taster or whether it is for you.
2. Build up your confidence, there are sessions and lessons you can go to to improve your technique and make other paddling friends
3. Board selection: my board is inflatable so I can get it in my flat and big enough to hold 2 people so I wasn’t worried about bag weight; but there are some boards designed for surfing and other ways of riding. Decide how you want to ride (maybe do a taster of each type) and ask advice from the other people on the set up which will work for you.
4. Get out there! Stay safe and consider how the weather will effect you. Wind is hard to paddle against because your body acts like a sail and it picks up waves.
[/fusion_text][fusion_images picture_size=”fixed” hover_type=”none” autoplay=”no” columns=”5″ column_spacing=”13″ scroll_items=”” show_nav=”yes” mouse_scroll=”no” border=”yes” lightbox=”no” hide_on_mobile=”small-visibility,medium-visibility,large-visibility” class=”” id=””][fusion_image image=”http://lvv.a25.mytemp.website/wp-content/uploads/2017/11/G0061023-300×225.jpg” image_id=”3556″ link=”” linktarget=”_self” alt=”” /][fusion_image image=”http://lvv.a25.mytemp.website/wp-content/uploads/2017/11/G0071048-300×225.jpg” image_id=”3555″ link=”” linktarget=”_self” alt=”” /][fusion_image image=”http://lvv.a25.mytemp.website/wp-content/uploads/2017/11/20170530_210728-300×169.jpg” image_id=”3554″ link=”” linktarget=”_self” alt=”” /][fusion_image image=”http://lvv.a25.mytemp.website/wp-content/uploads/2017/11/IMG_20170602_103958304_HDR-169×300.jpg” image_id=”3553″ link=”” linktarget=”_self” alt=”” /][/fusion_images][/fusion_builder_column][/fusion_builder_row][/fusion_builder_container]
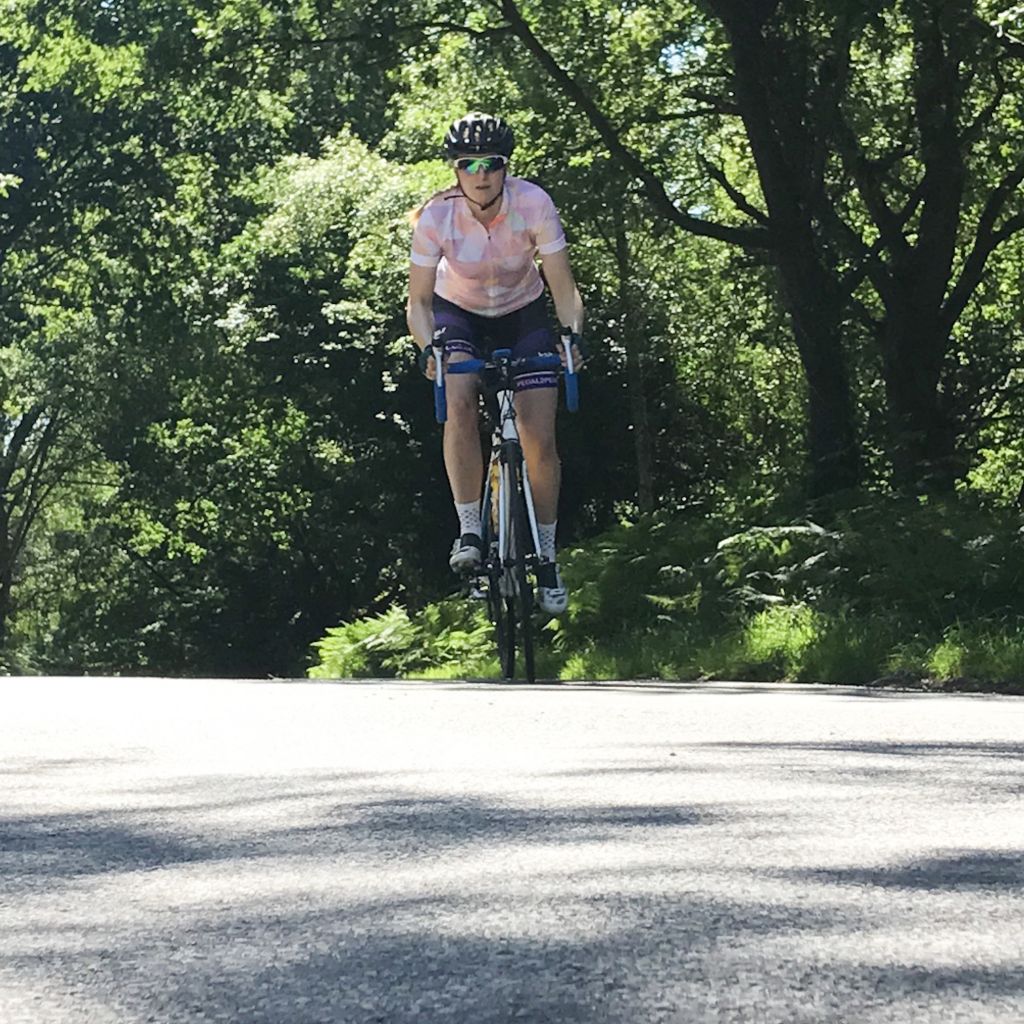
by hattenburrow | Aug 13, 2017 | Coaching, How to
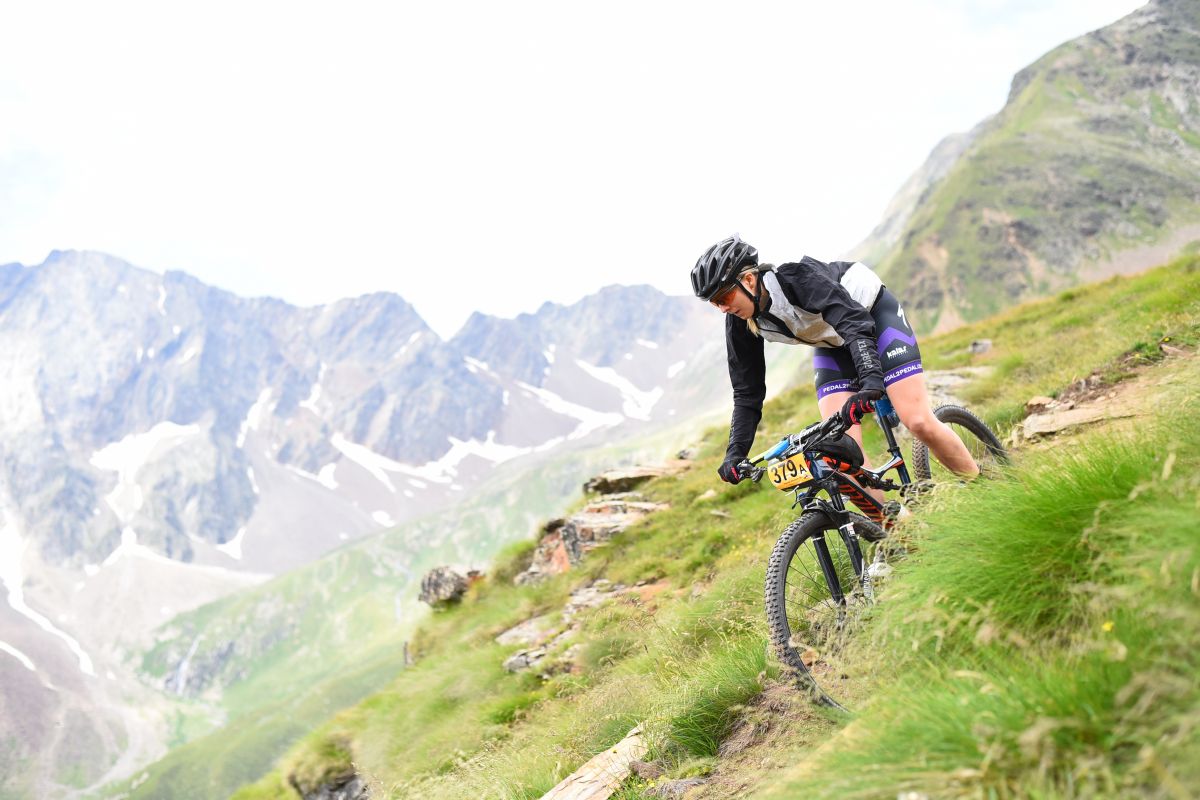
Whether you’re riding on or off-road after working hard to get to the top of the hill it’s good to be able to recover and enjoy the descent.
In this blog post I am going to give you my top tips for going downhill on your bike with confidence.

Mountain Bike:
Going downhill on a mountain bike is the most exciting part, most of the time, gravity takes charge and with good skill you can navigate down almost any terrain whilst the countryside zips past, with the wind on your face and the ground undulating underneath you it’s a thrilling experience, as long as you feel safe and in control that is.

Here are my tips on riding with confidence downhill on a mountain bike.
- Get your body in the correct position. Make sure your feet are level on the pedals, this is called the ready position; raise your bum off the saddle so you can move around on the bike. Have a bend in your knees and elbows, your heels should be down pushing into your pedals.
- Keep two fingers over your brakes all the time this allows you to gently squeeze them on as and when you need them. Use your back brake before your front brake.
- Stay relaxed. Your knees should be pointing slightly outside your toes, not gripping your frame and your upper body should be loose. Do a few shoulder rolls and you will soon find out if you have tensed up.
- Look where you want to go. This sounds like an obvious one but looking further ahead enables you to pick the best line down the trail so you can flow down the single-track not losing any speed and avoiding obstacles.
- Practise makes perfect. Practise your descending technique on hills you feel comfortable with and as you feel more confident move to steeper longer descents.
Road bike:
The speeds you can reach on a road bike can be incredible, to enable you to be safe on the roads here are some key points you should follow.

- Controlled braking. Control your speed using periods of braking with both your front and rear brake together with equal force.
- Descend on the drops. You can get more leverage on the brake levers if your hands are on the drops, rather than the hoods.
- Body position. If you want to slow up use your body as a wind brake by sitting up.
- Look ahead for hazards. It’s important to spot hazards early, which means looking well ahead down the road to anticipate any potential obstacles, changes in terrain or oncoming traffic. Wet drain covers, painted lines, speed bumps, gravel and leaves should be avoided were possible.
- Set your speed before a corner. This applies off-road as well; setting yourself up to carry the speed you are comfortable with around the corner is important for smooth, safe cornering.
I hope you have found these tips helpful. If you would like to find out about coaching or have a question please comment below.
Thank you

by hattenburrow | Jul 20, 2017 | Coaching, How to
Having spoken to some friends and followers I am going to write cycling tips every other week (I may put in some newbie mountaineering and kitesurfing tips to mix it up a little as well) Follow along my subscribing to my blog (link at bottom of home page). I hope you enjoy, comment with any questions about cycling.
To kick it off here are my top tips for better hill climbing.

Long steady hill climbs can be really tough that feeling like the hill may never end is one I have felt many times before. But don’t fear most hills end, eventually and the reward of the view and a well-earned drink stop from the top can be well worth your achy legs and perspiration on the way up.

Tip one – When reaching the bottom of a climb don’t change down into your lowest gear, not only will your legs be spinning like crazy and you will lose the speed you have gained in the previous flat or downhill but you then have nowhere to go should the climb get steeper or more tricky. Instead if you need to change down one gear lower and work on a basis of when your cadence drops counting to 10 and then changing down, that way you get the most out of each gear change.

Tip two – Breath, as it starts to get harder doesn’t forget to breath, try breathing in and out in time with your pedal strokes in through your nose and out through you mouth if you can. Try not to breath too quickly as this will psyche you out.
Tip three – Look ahead and focus on breaking the hill down into milestones. Once it starts to get hard if the climb in lasting over 10/15 minutes break it down into manageable chunks and see every chunk as a mini goal that way you don’t think of the climb as one mega beast but several small beasts joined together, much more manageable!
Tip four – To stretch out your back and also work other muscles, if the hill is not too steep stand up on the pedals for sections of the climb this will allow you to put more power through the pedals. If the surface is loose don’t stand up as your weight on the back wheel will spin/slip out.
Tip five – Steady cadence, try and keep your pedals going round at a smooth & consistent pace. If you feeling like your pushing really hard on your pedals go down a gear or two, likewise if you feel your feet are spinning then you can probably go up a gear.
So these are my five top tips to improve your hill climbing if you would like more tips and coaching please get in touch.