Cycling has been on a steady rise in the UK for several years now and this increase in popularity and participation is showing no signs of slowing down anytime soon. Cyclists can be found in cities and rural locations throughout the country as we become more aware of our impact on the environment and keeping ourselves fit. With all of this comes an appetite for a cycling adventure where you can test yourself in new surroundings and hopefully sample a little sunshine along the way! If you have never been on a cycling trip however it can be tricky to know where to start. If you find yourself in this category, then here are some tips on how to prepare for your upcoming cycling trip. If you need any more advice please feel free to contact me too I would love to help!
Map It Out
It’s a good idea to know exactly what route you will be taking so you will know the distance and have an idea if how long it will take to get to your end point each day. Knowing the typography of the terrain will also be useful when planning how much food and water you may need to carry, as well as supplies if your climbing high you may need to think about a water/windproof as the mountains can create their own weather. Strike the right balance between having a challenging experience and enjoying yourself.
Take Time To Recover
Recovery days are just important as active days on a lengthy cycling trip. Doing this right can be the difference between having an enjoyable experience and achieving your goals or well, not. Recovery days don’t mean that you can’t do any cycling at all, although if you want you could plan a day of relaxing by the pool or sightseeing, but usually a recovery day just means going on shorter and flatter routes. This will allow you to take it easier and once you have recovered the next day you can go up another couple of gears.
Think Of Your Saddle
This is a pretty important point that lots of people still seem to overlook. If your backside gets sore on your leisurely countryside rides then it’s going to feel a whole lot worse a couple of days into a lengthy cycling trip. Make sure that you find a saddle with extra padding and that your cycling shorts have sufficient padding as well. Give it a test before you set off on the trip and it’s vital that you pack plenty of chamois cream to soothe any aches along the way. Chamois cream is a must, try out a few before you set off.
Think About Transport
One of the biggest questions people have before embarking on their first cycling trip is how they can transport their bike to their destination and ensure that it will still be in one piece when it gets there. If you are travelling by boat, then you should have no problem taking your bike onboard but if you’re flying then it gets a but trickier. Luckily there are luggage shipping services that specialise in shipping items as bikes ahead so that it will actually be waiting on you when you arrive.
Gear Up!
When it comes to a cycling trip you’re only as good as your tools and in your case these tools (along with your bike) will be gloves, helmet, eyewear, shoes, shorts and adverse weather clothing. You will probably already have most, if not all of these items but you might want to buy new versions of each one to ensure that you are getting the maximum levels of comfort and durability from them. These two things are equally important on a cycling trip, so you need to find the right balance without sacrificing one for the other.
Along with this wearable gear you should also pack plenty of high energy snacks and fluids to keep you fuelled along the way. I recommend dates, salted peanuts and malt loaf as good riding snacks and Dyrolyte is a brilliant way to stay hydrated without using the sweet tasting hydration drinks on the market. Getting punctures is an inevitable part cycling and so you will want to learn how to fix a flat tyre before you set off. Even if you have fixed a flat in the past you should practice again on your own bike just to refresh yourself, believe me this could save you a lot of hassle in the long run.
A cycling trip should be a fun experience, sure it will be challenging but if you prepare in the right way then those challenges should still be enjoyable and manageable, so preparation really is key.
Stuart Cooke is from Uni Baggage, a luggage delivery service who help cyclists all over the world send their bikes ahead so that they can challenge themselves on new adventures.
I met Dave on one of my first adventures, to Switzerland with Dogtag when I was just getting my outdoorsy ‘wings’ and taste of getting out and living life to the full. Since then he has been on one big adventure himself, getting married and having a beautiful baby girl, Agnes. this is their story.
“Becoming a parent was the single most awesome adventure of my life. Those first moments, nights, days and weeks can’t be matched.
Myself and Alice, both have a keen love of the outdoors, we knew from the offset Agnes was in for an adventurous start to life. We wanted to work out the magic mix of getting outside, doing the things we love, whilst keeping family fun at the centre. Step one. We left the house within the first three days… At three weeks old we packed up Agnes and headed for canal life, staying on a boat for a week cruising our way along the Kennet and Avon Canal. Despite the limited use she had at the lock gates, we made it 10km along the canal. That might not seem far, but canal boats go very slowly especially when interrupted with frequent milk and poo stops. However we tested the formula of baby + outdoors = a lot of fun, despite the added challenge!
We tested this formula more and more, going away at weekends to see different friends and family, although these trips were all slightly easier than the canal boat trip, they built our confidence for the next big challenge! This came in the form of camping… Agnes was 7 months old, the trip was to Guernsey and involved a medium length drive, with a baby who hates car seats and a trip on a ferry!
Camping was easy and made much simpler with co sleeping, which we had done from the start. We didn’t need to worry about a travel cot, she just snuggled down with us at night, (please look into the risks of doing this yourself, do so at your own discretion). She loved being that close to Nature and to us! The weekend away was a success!
The next big challenge, A 21 hour drive with an 8-month-old who still hated the car seat.
A few of us die hard adventurers decided we wanted to spend a week in the Alps together. Bring the mountain bikes, bring the hiking boots and definitely bring the kayaks, just like the good ol’days, but this time we were also taking the babies… What could possibly go wrong?! Really, we wanted to test and strike a balance of family fun and the gnarr of old.
Agnes still hates her car seat, despite sleeping in it all the way to the Alps and all the way back, with no problems. Check out how the trip went here!
Our next adventure involved a relatively short 12 hour drive to Islay. Islay is a truly beautiful island. An inner Hebridean gem, just off the coast of West Scotland with Jura a stone’s throw away. It’s really hard to put my thumb on exactly where Islay reminded me of. In fact, the scenery changes so quickly in such a small space, you could be on a white sandy beach one minute and a bog the next. One road I ran along looked like Dartmoor on one side and the lake district on the other!
The tone of the trip was a little different to the one in the summer sun. It was crisp and cold, filled with hikes, swims, runs and family fun. I did manage to get out in some 9 ft surf though in my kayak…
Take a look at my video to get a real feel of the beauty of this place!
So, does it actually make much difference travelling and adventuring with a baby? Not really, it just needs more planning, nappy changes and stops. Adventuring this year helped us understand that having a baby actually enhances experiences in so many ways, you see things you wouldn’t stop to notice before, pretty little flowers, wood ant nests, little warbling streams! Now I’m not saying go out and proliferate… adventures are still fun without babies, but what I am saying is that the pre-determined belief that your life as you know its ends in all forms when you have a baby, just isn’t true. In fact, you can do everything you did before, just with more planning and sleep deprivation. Who knows what else we will do with the poor gal. All I know is that plenty more adventures await!
Hi Folks! I hope you’re having an awesome run up to Christmas. As part of my guest post series I would like to introduce you to Spider women herself! Miss Georgina Jackon;
“During the weekdays I am a systems engineer for a large British aerospace company, and during the weekends I do my best to get out in my self-converted van with my partner and have fun. Whilst we mostly climb, walk, scramble, slackline and practise acroyoga in the U.K., we try to get abroad to new and exciting places as often as possible and to try different things, such as Scuba Diving in the Jordanian Red Sea in April.”
Over the next two weeks Georgina will, explain the many types of climbing and then shall her favourite spots to try this fantastic sport.
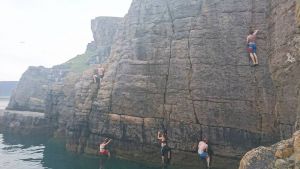
Climbing is for everyone. And it will solve pretty much all of your problems.
This is not a statement that I make lightly. I have climbed with blind people. I have climbed with those who have no lower limbs. I have climbed with toddlers, teenagers, pensioners, and everyone in between. I have climbed as part of a team and I have climbed alone. And that’s just at my local indoor wall.
Climbing is one of those special things that forces you to focus on the moment. It forces you to live right here, right now. Because if you don’t, well, you fall. And it is that very thing – falling – which will make you a better, well-rounded person in every-day life.
Falling brings people together. The climbing community is unlike anything else I have ever found in life. It is honest. It is humble. It is more supportive than you could imagine. It is diverse, it is willing to learn, and it is definitely willing to teach. The sport seems to demand it, really. I mean, the only way to learn how to climb is to do it. And by definition, learning often involves failing, which in this case involves falling off. In this way, climbing can build confidence. It builds endlessly on psychological factors in how far you can push yourself, fighting the instinctive and inherent fears involved with falling, and in building trust and good relationships in those you climb with. You would be amazed how much it builds physical strength and co-ordination, and yes, in places you wouldn’t expect!
It is not too expensive. It is not restrictive. It is beautiful, it is inclusive, and it is personal and respectful, and for a lot of people it becomes a way of life.
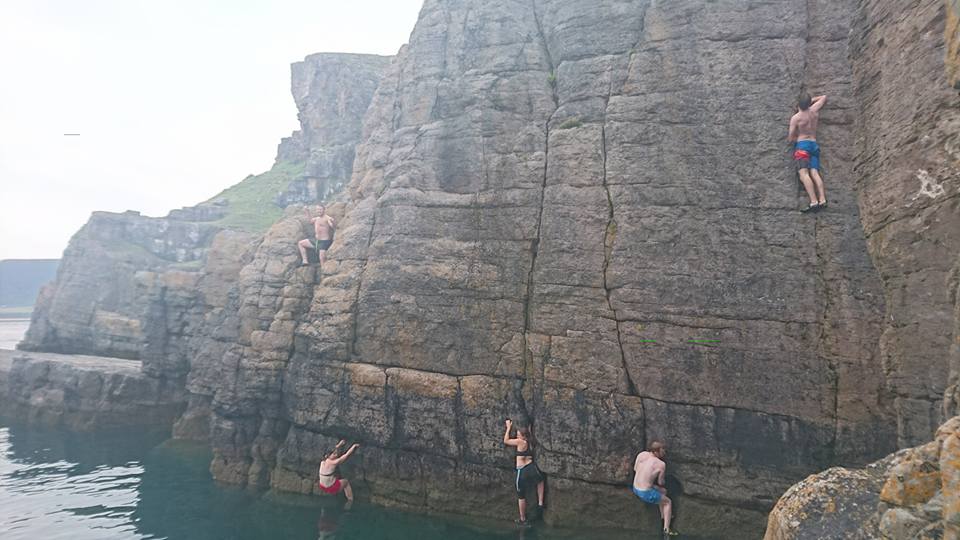
There are many different types of climbing – definitely enough to suit all needs and types, and each has its own quirks and nuances and differences, and each also receives the respect that it deserves from the climbing world.
Bouldering
Bouldering is typically climbing on boulders (go figure), without any ropes. This means that often routes can be quite short, with quite powerful and/or technical moves. Bouldering has two ‘spin-off’ disciplines. One is called ‘high-balling’, which is where the boulder is particularly tall and so the route is especially long in length for a boulder, making any potential falls and landings dangerous. Particularly if bouldering outside, a ‘spotter’ will be used by the climber. A spotter is a person who stands near to the climber, prepared to support the climber if need be or push them towards a safe landing or landing position if they fall. The other spin-off of bouldering is called deep-water soloing, which is the same type of thing again, but done above deep water. This means if you fall off the climb, you fall into the water and not onto the ground (or a crash-pad!).
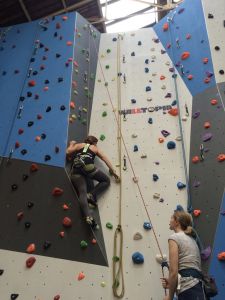
Sport Climbing
Sport climbing is where someone has placed protection into the rock already in the form of bolts, in a fairly even spread over the length of the route. To this end, the routes are often much longer than bouldering routes, and allow many different types and locations of rock to be accessed. The bolts are then clipped into by the lead climber using a quickdraw (a set of snap-gate carabiners joined together by a dog-bone shaped piece of tough material, usually either nylon or dyneema,). One end of the quickdraw gets clipped onto the bolt, and the other end gets clipped onto a rope attached to the climber’s harness. A belayer at the base of the climb will then use a belay device attached to their own harness to protect the leader if they fall, and to lower the leader after they have completed the climb. This is a device which can use frictional forces in order to stop the rope from moving, and thus ‘catch’ a fall.
Trad Climbing
Trad (traditional) climbing is where there is no pre-placed protection in the rock. All protection is placed by the lead climber as they climb the route. This involves placing different sizes and shapes of bits of metal (called nuts or hexes depending on the shape, and cams which have a movable head that gets placed in the rock), and sometimes slings (a loop of tough material, either nylon or dyneema). Once the climber has finished climbing the route, their belayer normally ‘seconds’ the route, removing all of the gear placed by the leader as they go, and being belayed from the top of the route by the lead climber.
Alpine and Winter Climbing
Alpine climbing is an art form which can see people spend many nights on a mountain, and sometimes weeks on a single wall or cliff-face alone (a form of this can be seen in ‘Big-wall climbing, such as climbing El Capitan in America). It can often involve ice climbing, where ice screws are wound into the ice to provide some protection for the climber, who uses ice axes and crampons (spikes for mountain boots) to bite into the ice and hold the climb up. It also often involves crossing glaciers, crevasses, and snow fields, and sometimes aid climbing, which is where the route is not climbed using hand and foot placements, but climbed by ascending the rope as such, instead of the rock. If you are not aid climbing, you are seen to be ‘free-climbing’.
Outdoor climbing is obviously based around the naturally formed rock, so you do not have a choice or say in what the route is like. However, indoor walls can be made to various shapes and sizes, and holds (often made by moulding resin and plastic, but also sometimes wooden) can be multiple sizes, shapes and colours, and placed in any arrangement you can think of. ‘Pulling on plastic’ is very different to being on real rock as outdoor climbing is much more three-dimensional than indoor climbing, and more open to accommodating different climbing styles since it is not as obvious where holds are, and of course, you can’t really climb outside in the rain. There are many different types of rock, and many different types of routes, so be sure to try different types of rock at different crags and in different styles (this goes for indoor climbing, as well!). For example, an overhanging juggy route may be just up your street, but your local crag is slabby slate which is tiny finger crimps, and this can put off those just starting out.
Sport climbing (both leading and top/bottom-roping) and bouldering (sometimes simulated deep-water solos, either over a pool or over a foam pit) are the most typical types of climbing available at indoor walls. Some walls can provide indoor, artificial ice walls for ice climbing, or even walls for dry-tooling. This is where climbing axes are used not on ice, but on rock, and can lead into mixed climbing (a route which has a mixture of rock and ice on it). If indoors, normally wooden holds and features are used for axes (no crampons), or wooden axe handles with material loops on the ends of them get hooked over indoor climbing holds to simulate an axe placement.
With indoor climbing, a route is seen to be completed if you place both hands (in a controlled manner) on the highest hold of that route, without falling off and only using the intended climbing holds for that route (i.e. only use one colour of hold within a certain area on the wall). If you can do it first time, it is called a ‘flash’ in bouldering, and an ‘on-sight’ in sport and trad climbing. If it takes you a couple of goes, it is a redpoint, and more than that makes it a project. Projects aren’t often possible with indoor climbing as the routes will be reset frequently and so your project will no longer exist!
In the U.K., almost every indoor centre will let you start bouldering with no prior knowledge or experience, and most will hire out specific climbing shoes as well. These help to bind your toes together so that you can place more weight and pressure on certain parts of your feet, and also provide better grip because of the rubber soles. It is widely accepted that helmets aren’t required for most indoor climbing – in fact, they can make it more dangerous than without, as they can catch on holds, so don’t worry too much about wearing one. If you want to learn how to belay and use ropes however, climbing centres will not allow you to do so without a test. This can include pictures or statements where you must be able to explain what is incorrect in the scenario, and displaying that you can successfully tie the correct knot for attaching the rope to your harness. If you have climber friends, they will often be allowed to supervise a couple of people at a time whilst using ropes and harnesses, so I would suggest getting them to teach you some things if you wish to take up route climbing. Otherwise, most centres will provide ‘Learn to Climb’ courses which will teach you the basics of climbing and safety whilst climbing indoors, but these can be expensive. If you want to learn and improve technique quickly however, focus on bouldering. If you are interested in gear, strike up a conversation with any of the staff at your local wall, or simply search online. There are many climbing community forums, sites and pages, such as UKC, BMC, and Climbing!
The first few times you start climbing, the place you will feel it most in your body is your forearms. This will decrease over time and you’ll find quite quickly that gains are made – you can start staying on the wall for longer periods of time and being able to grip and hold onto different things. So stick with it and don’t be put off too quickly! The community will quickly welcome you in and for most of us, it becomes a way of life. Climbing is an easy way to build strength, balance, co-ordination, confidence, and communication. Really, the only way to get better at climbing is to climb, so get out there and have fun! It might just change your world.
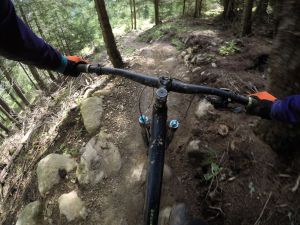
A lazy start with a fantastic breakfast at the Die Berg hotel. We looked out onto a rather drizzly mountain, hoping the sun gods would bless us with some good weather for our endure day.
At intersport I picked up my new ride for the day a Cube Fritzz race enduro bike with 160mm travel on the fork and 27.5 tyres it looked like a serious bit of kit!
Today was the day to try the other side of the mountain. After getting our bikes and heading to the lift, I was glad, in the weather conditions, to have my Grip Grab gloves and shoes covers to help keep me warm.
Arriving at the mid-station at 2,174m we stepped out into a blizzard of snow. I instantly felt the chill in my bones and didn’t need to read the temperature gauge to know it was below freezing.
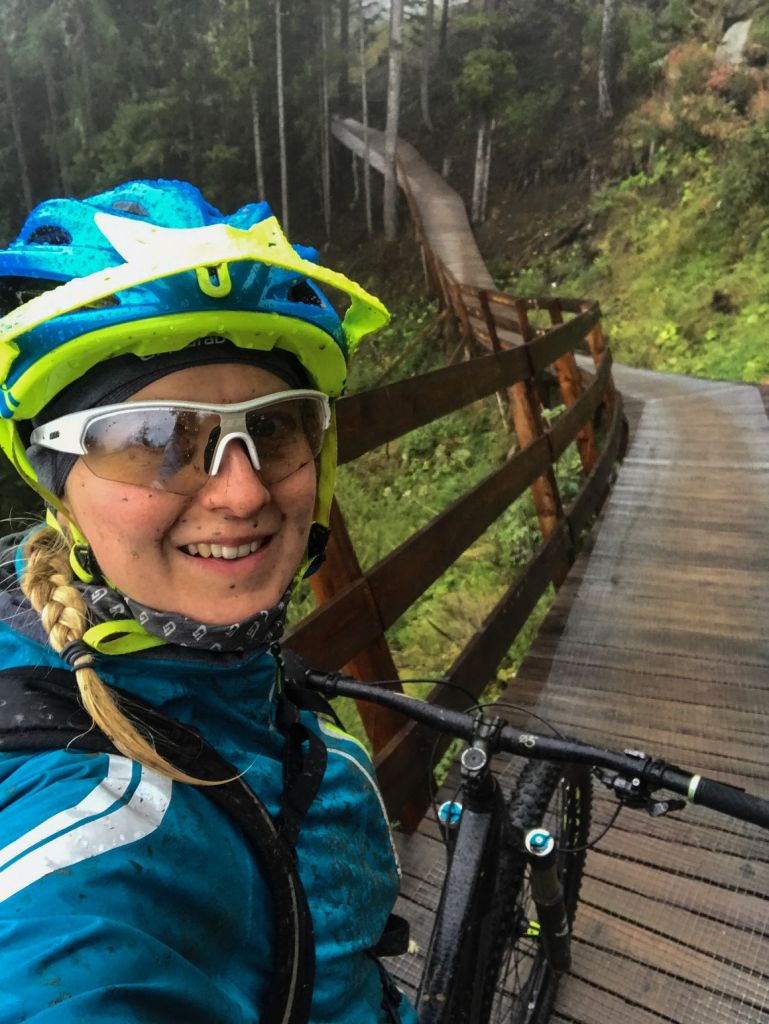
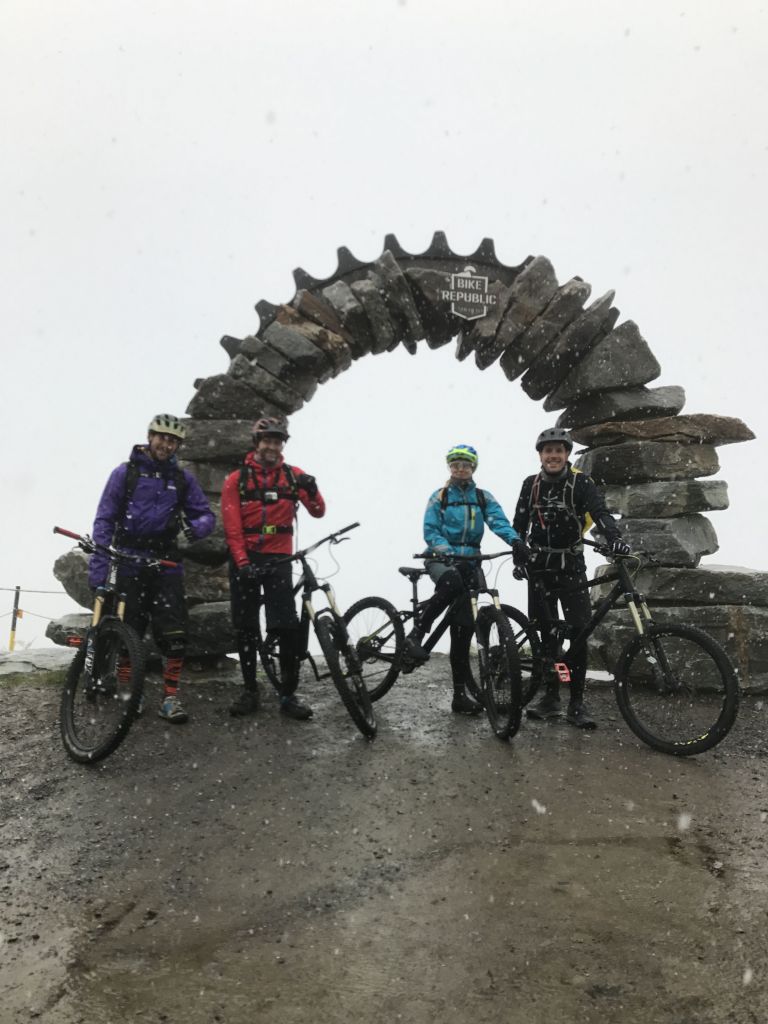
The trail from the mid-point took my mind off the cold as I cruised down large flowing berms loving the freedom and exhilaration of the smooth trails, constructed by Bike Republic Sölden.
The ‘flow trails’ are man-made with features like board rides, rock crossings and berms. These trails are designed in a way that allows you to flow from feature to feature down the mountain, hence the name. Their flowing lines are cut into the side of the mountain and maintained by a team of trail builders.
We saw a lot of wildlife from deer, stoats and plenty of birds of prey. It is one of the reasons I love biking you can really get close nature and see incredible wildlife you wouldn’t see in a car.
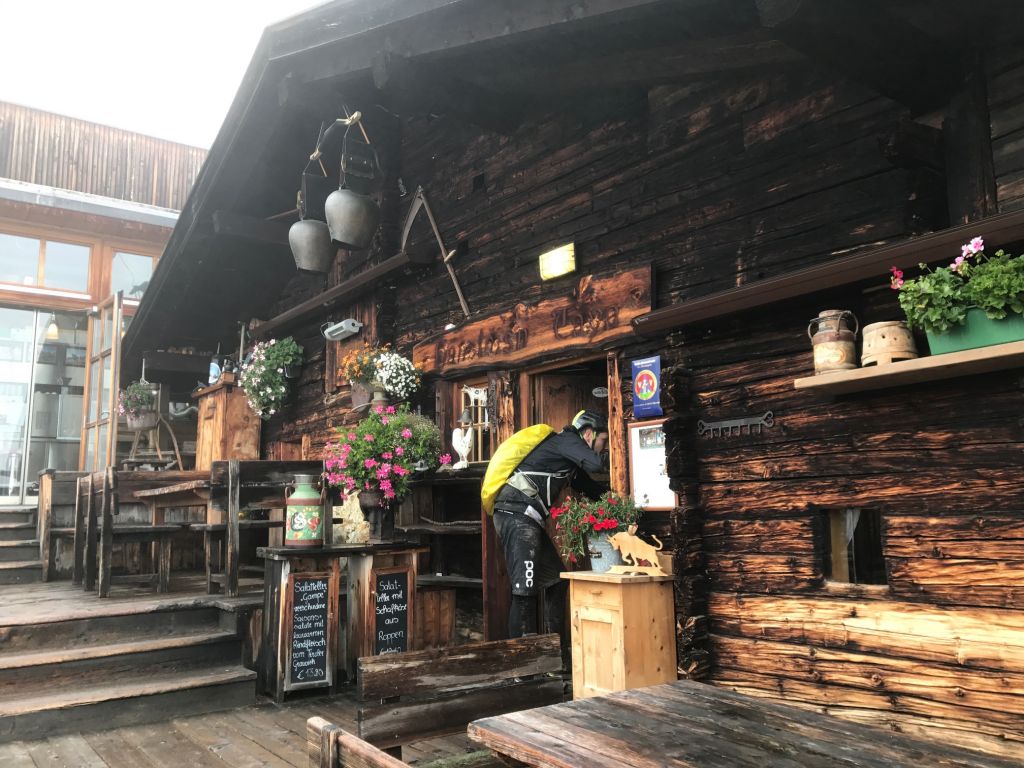
The other thing I love about mountain biking is the ability to go on an adventure, a journey. We traversed the side of the mountain climbing and descending until we got to our lunch stop. A beautiful hut called Gambya Thya at over 300 years old. It had been run by the same family for years, making award winning cheese and ham. We were in for a treat! The quaint wooden hut was filled with ribbons from award winning cows and photos of days gone by. The little rooms were full of character and the family’s welcome arms made me feel warm after being in the fresh alpine air.
We tucked into Austrian delicacies, drank mugs of warming hot chocolate and sipped on schnapps made from pine cones. What more could a mountain biker need on a lunch stop?
Revitalised and well fed we headed out to continue our trail adventure, stamping more lines as we weaved our way down the mountain and back to the valley below.
Wednesday –
Heading to the airport at 1pm it seemed like a missed opportunity not to grab our bikes and head back up the mountain. This gondola was bigger and you could wheel your bike right in and sit next to it. This was much more convenient than trying to balance it on one wheel in the other gondola. Up at the top the view was breath taking. The mountains stood elegantly in the sun, their white rocky peaks towering above the lush green valley below.
The first trail of the day was called Habe line, this was a new section of trail and in places the gravel had not bedded in yet, making the sharp turns a little more challenging. After the top gravelled section we came into a muddy section of berms hitting one a little too fast I has a moment of mud slide and ended up looking like a mud monster on one side! Typical on the day I had to pack to fly home!
A bit like snowboarding having the views and the viability in the mountains made the biking a whole different experience. The trail was dry (in most places) and the bike ate up the ground underneath it, rolling from berm to berm gathering speed before I would break and re focus on the next trail feature.
Breaking out of the forest descent onto a plateau we came across some very friendly alpine cows. They were so inquisitive coming right up to us and even licking one of the guys leg!
My favourite bit of the descent was a board ride snaking its way through the trees and down the mountain side, it was like you were flying through the tree canopy alongside the squirrels. My main challenge was keeping my eyes looking ahead as sometimes through the trees would be the most amazing mountain view, which would grab my attention for a split second as I flew past them.
The flow trails were really good fun. There is a good network of trails suitable for all types of rider, but the trails are not easy and should be treated with respect and not underestimated, after all this is a mountainous playground where the weather can change in a moment so you need to be prepared and understand how to handle your bike in order to stay safe and enjoy the trails.
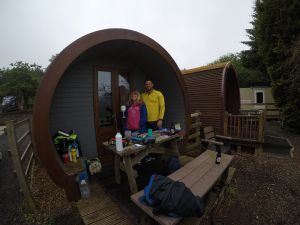
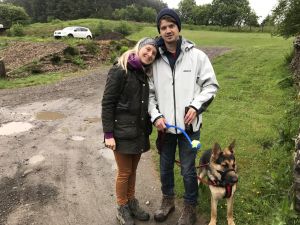
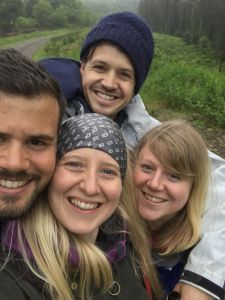
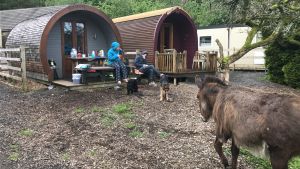
This one was no exception, on Friday night Lauren, Stu, Martyn, myself and the dogs drove to Wales for a spot of Glamping.
Glamping is a form of ‘glamorous camping’ which combines the luxury of a warm cosy night’s sleep in a real bed (usually) with the element of adventure in the outdoors.
We stayed at Bryn Betws Lodge in Afan Forest Park in ‘glamping’ pods which were little wooden huts with blow up beds, lighting, electric and that was about it! I have never been ‘glamping’ before and it was nice to arrive in the dark and not have to worry about fiddling with tent poles by torch light.
The pods were very basic and camping equipment like stove, plates/bowls, sleeping bags and pillows were needed. It was nice to have lights and electric two things I have learnt to deal without camping.
Glamping in Wales
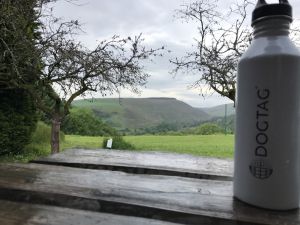
The pods had benches and chairs where we ate breakfast and admired the views.
Saturday morning was drizzly but this didn’t detract from the beauty of the Welsh valley, a medley of green and grey rolling hills. After a somewhat leisurely start to the day we headed up the forest tracks with the dogs in search of a good pub. Now the keen eyed of you probably noticed I said ‘up’ and yes I thought I had seen a sign for a village going up the side of this hill, after a while it became apparent I was wrong.
Retracing our steps the rain cleared slowly as we walked down into the village below.
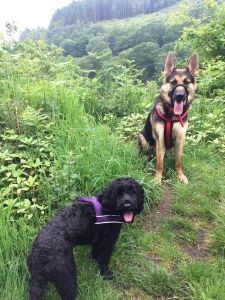
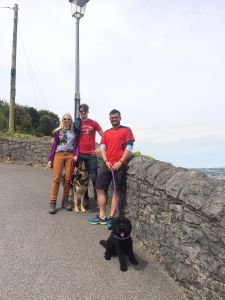
Since having a dog Martyn and I have tried to take Luna (the dog) to as many places as possible, finding dog friendly pubs in Wales proved to be a challenge over the course of the weekend, one that I am sure other dog owners can appreciate. (If you know of any good dog friendly pubs in Wales please comment below and I will add links to these for others!)
Arriving back at our pods, the hot and now damp weather had whipped the midges into a frenzy so we re-treated inside to play Linkee (a camping essential). I was just about to ‘win’ a letter K when there was a knock at the pod door. A smart gentleman stood with a bottle of prosecco in his hands and we were invited to a wedding! It turned out an episode of Don’t Tell the Bride had been filmed and the groom (prosecco in hand) said we were welcome to join the party.
Fast forward a few hours and we were the only four people on the dance floor. Sunday morning brought some sore heads and mountain biking was put on hold until the afternoon.
We spent most of Sunday exploring the beaches around the Gower Peninsula (Swansea end) I have never been to this part of Wales and the rocky cliffs stretched up for miles towards the peninsular from Swansea bay.
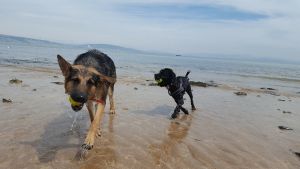
The dogs loved the beach and we had soon lost or broken several tennis balls in their enthusiasm to run and chase them down.
By the time we got back to the pods the beach air and walking had created 4 tired humans and two tired puppies!
Monday was our last day in Wales and it came with another slightly random surprise as we opened the pod doors three donkeys were chilling out in our camp area. The donkeys were keen to get to know the dogs, it’s safe to say this was not a mutual friendship!
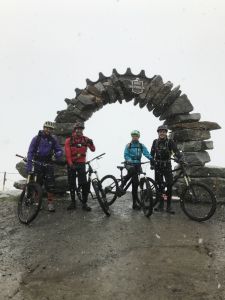
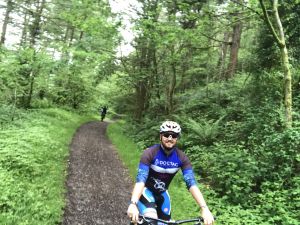
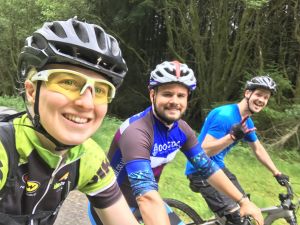
Packing the cars we headed to Afan Trail Centre where Martyn and Stu hired bikes. This was Stu’s second time on a mountain bike and the plan was a ‘gentle’ loop of Y Wal. Y Wal is a swooping 24km mainly singletrack loop where the descents and the views are both breath-taking. It is a red graded trail which, according to the guide book, boasts some of the best singletrack in the UK and I must say after riding it I agree. We climbed fire road and more technical singletrack climbs, rode along exposed ridge lines and weaved our way through the forest. It was exhilarating.
If Canada is the Mecca for adventure seekers then Whistler is the shangri-la of snow sports. Arriving for our five day whirlwind visit, Whistler was a hive of energy. 8,171 acres of powder, over 200 trails, Whistler boasts the longest unsupported gondola (4.4k,) joining the Blackcomb and Whistler peaks. In an average year they have 11m of snow making this a powder capped heaven! With a great mixture of blue, red and black runs Whistler has something for everyone.
During our (Martyn & myself) trip we ventured into the back-country for the first time with a guide. An experience that Martyn and I will never forget.
Back-country Snowboarding
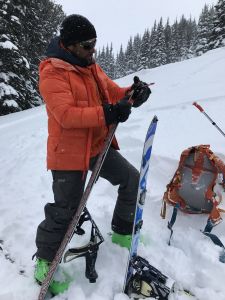
We met our guide, J.F from Coast Mountain Guides at the bottom of Whistler gondola with nervous anticipation as we talked through the avalanche safety gear and created a plan for the day. J.F is a highly experienced mountain and ski guide with years of experience, he probably shares more in common with mountain deer than Martyn and I though, as we stood there un-aware of the adventure that was about to unfold.
Coast Mountain Guides was started by Guillaume Otis with his Dad back in 1998.
They operate year round and provide mountain guiding services for a wide range of client’s skills and abilities.
The first challenge of the day!
Once at the top of the lift system, to make our way into the back-country we had to take a toggle lift – sounds easy right! Wrong. I managed to expertly fall off the long pole not once, but twice… The first time I hung on thinking surely I can pull myself back up, this turned out not to be the case, after a few seconds I collapsed into a crumpled heap in defeat as others slid by without a care, not struggling to sit on the pole that seemed impossible to me!
Third time lucky! With some help from J.F to balance the beast I made my way shakily to the top arriving with a smile and a sigh of relief! I made it. Wow…and we have not even started the challenging bit, I thought to myself!
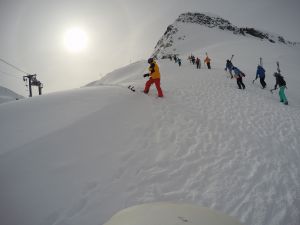
After a short run down we entered the back country gate, making sure our transponder’s where working as we passed through we left the lifts behind and walked into Mother Nature’s playground.
Whistler backcountry gate
The Ascent towards the unknown
Martyn and I had never been back country skiing before or, even walked up a glacier for that matter. So a brief lesson on how to split our board in two and then how to add the skins (sticky pads which ran along the length of each ski), so that we could climb the mountain. It was an odd feeling after being on a board to split it in half to use as skis it was easy to do once you got the hang of it.
Making tracks
We started the traverse to the summit. Using the ski tracks of the people that had been on before we slowly zig zagged up the side of the mountain not dissimilar to the way you would mountain bike up a steep hill.
Each binding had a heel riser so your heel stayed high to make walking up steep terrain possible, looking behind I was amazed at the distance we had covered considering we were moving slowly.
Walking up hill was hot work!
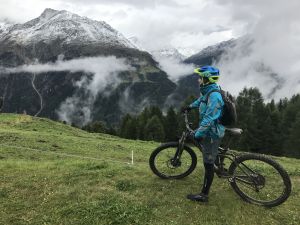
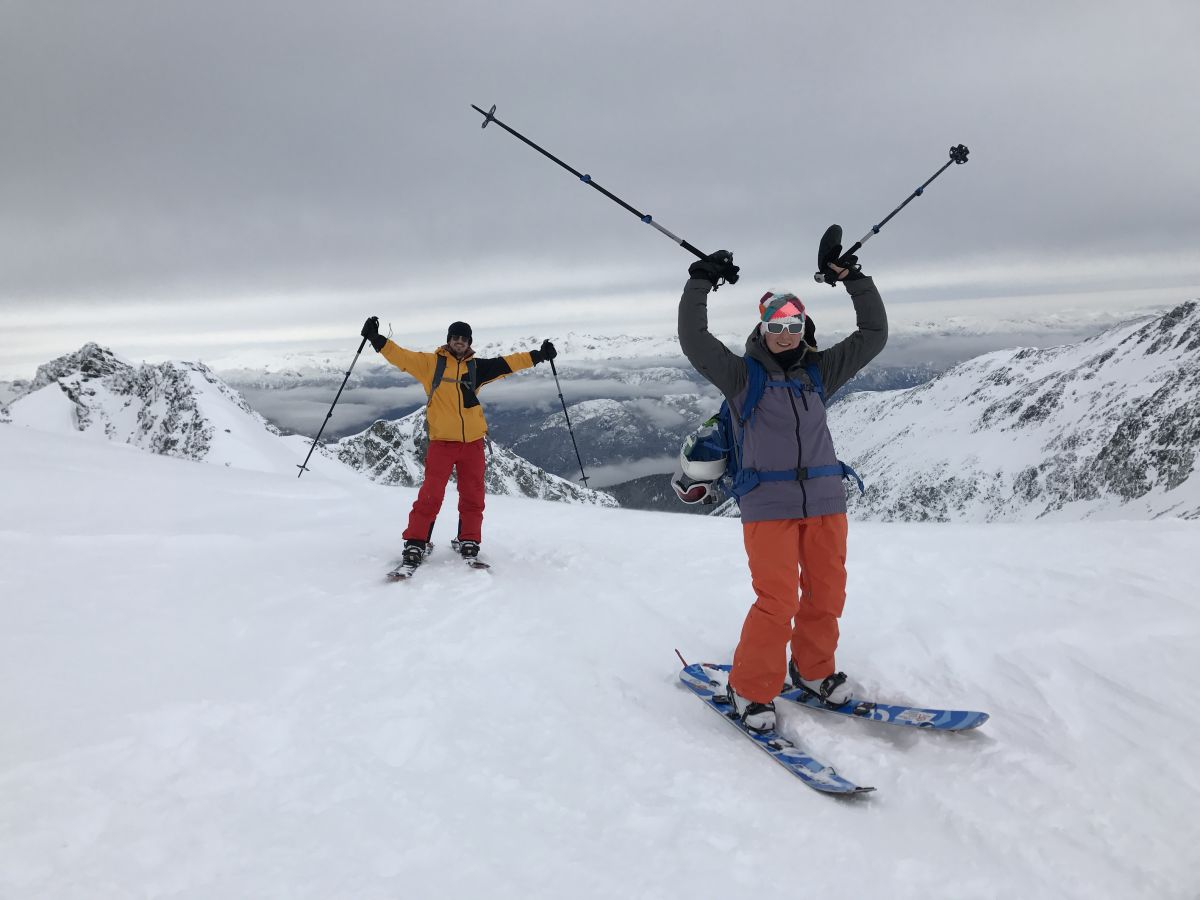
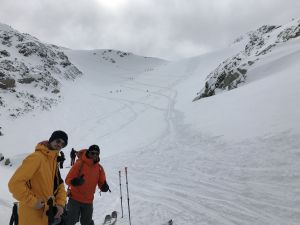
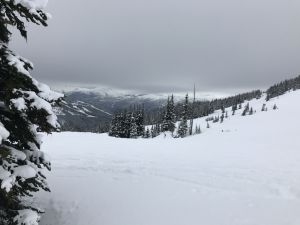
Reaching the summit, the Fitzsimmons Mountain Range stretched out before us in every direction, a majestic landscape, frozen and wild. The wind howled around us, whirling snow into tiny tornados. I felt in awe at the sheer power of the wind and the vast expanse of snow reaching out before us, I felt humbled by my surroundings and also a little chilly!
Looking into the back-country
We worked quickly to remove the sticky skins wrapping them back in our packs, releasing our bindings from each ski and slotting them back together to form a board.
J.F applying skins to skis
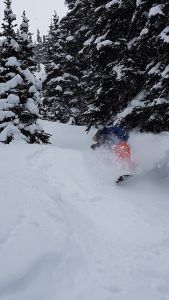
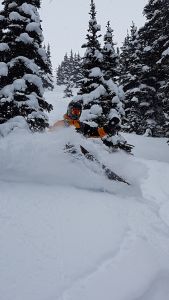
Carving Powder
With the wind thrashing around us we swooped over the edge into pure white powder, it was like riding through whipped egg whites, the board carved through the deep snow descending quickly down the slope.
We traversed the side of the glacier bowl staying high so we didn’t end up in the flat valley below. It was unbelievable gliding through fluffy clouds of powder making fresh tracks where no one else had been.
The clouds stole our view.
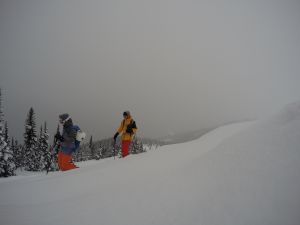
Making our way to the next climb, we stopped beneath a ridge. The approaching storm shrouded the tops and the dark clouds looks ominous, our perfect visibility was about to be snatched away from us. It was time to split our boards, apply our skins and make our way into the cloud. It was hard, hot work climbing pushing your ski forward with your toe and the pushing down with your heel so the ski gripped the snow.
At the top we used our skis to compact the snow, to make a ledge to work from, then it was time to reassemble our boards. The trees gave us shelter from the wind, we worked quickly to avoid chilling off. Stopping anywhere in high mountains in changeable weather can be chilly work and the colder you get the slower you get.
Reaching the top
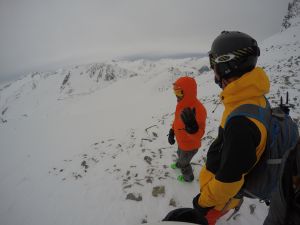
Ready to go, the visibility was making our route through the trees tricky so J.F went first then I boarded down to just below him and then it was Martyn’s turn. My first tree run was good however, on my second run I didn’t turn quick enough and ended up as a tree decoration! The powder was so deep my left leg sunk out of sight and all the pulling in the world was not budging it, when I looked up all I could see was snow which was a little frightening. I shouted to Martyn who heard the slight panic in my voice and came to my rescue. Its times like these that you appreciate having mates around.
Watch our for that tree!
After extraction – we made our way down to where J.F had stopped to wait for us. J.F had scouted a jump for Martyn who expertly carved through the fresh powder launching off the lump and got good height landing softly in thick, thick snow.
What a show off!
As we split our boards ready to head back up through the trees the snow quietly fell and the only sound was coming from us, crunching back through the snow covered trees. It was hot work walking up hill and I was nicely roasting by the time we stopped.
Skins sticking to the skis to make walking up-hill possible
Our last back-country run of the day was epic! The visibility had been reduced to about 15m because of the storm. It took all my concentration to work out the contours in the snow so that I could make good turns. Once we were lower the visibility opened up and we weaved through the trees and dipped out into a long run down to Whistler village. Buzzing from our day in the back-country – full of stories, memories and feeling exhausted Martyn and I stopped for a well-earned drink and to share some amazing memories of the day.
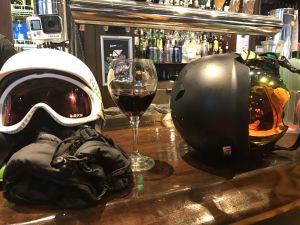
Wine time…
Tips for back-country:
Hire a professional guide, the equipment for avalanche safety is expensive. With proper knowledge of the areas guides can help you get the most out of your experience
Layers of clothing is king. Going from snowboarding down to skiing uphill – your temperature changes constantly so having layers to zip and unzip makes it more comfortable
Food and hydration. My water froze so a lucozade type drink would be better, every time you put your skins on take a sip to make sure you stay well hydrated
Being able to put your helmet and goggles inside your bag will mean they don’t fill up with snow! Mine did it was a brain freezing experience outing them back on!
THIS WEBSITE USES COOKIES
We use cookies to personalise content and ads, to provide social media features and to analyse our traffic. We also share information about your use of our site with our social media, advertising and analytics partners who may combine it with other information that you’ve provided to them or that they’ve collected from your use of their services. You can review our Privacy and Cookie Policies and at any time change or withdraw your consent from the Cookie Declaration on our website.OkPrivacy policy


 Trad Climbing